This article will show you where to mount the collapsing screws to remove the Ameridrive coupling flexible pack. It will also give you information about size and thread requirements.
To remove the flexible pack (the pack is the assembly between the arrows numbered 1), you need to compress the flexible disks so that it occupied less space and then it will come out.
Take it that all the lock-out and safety procedures are in place.
Remove the nuts and bolts numbered 2 in the photo except for two at the 9-o-clock and 3-o-clock position. These need to be loosened but not removed. These will support the flex pack until you are ready to remove it.
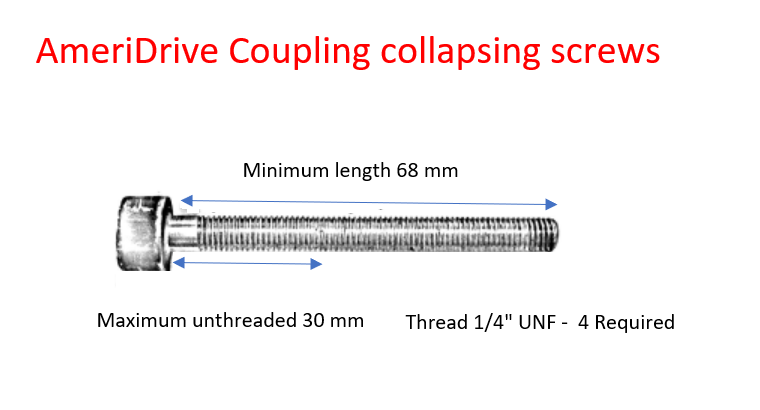
Install the jacking bolts 3. These bolts are the same ones you removed above. These are installed in four positions around the coupling and will compress the flex pack when tightened. Before tightening install the bolts 4 which will have to be purchased or made in a workshop (see photo below). The bolts will maintain the pack in the compressed position when removed.
Install bolts 4 hand tight.
Tighten screws 3 to compress the flex pack.
Then screw bolts 4 in by hand – don’t use these to compress the flex pack.
Once the pack is compressed enough to remove, slacken bolts 3 after ensuring bolts 4 are tightened up by hand.
Support the flex pack and remove the remaining bolts 2.